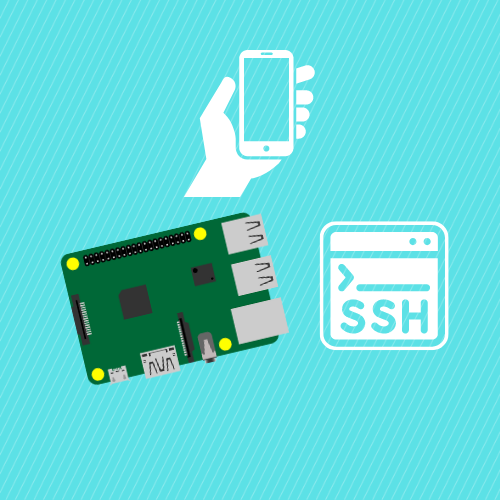
Raspberry Pi SSH Access: Anywhere, Anytime - Guide
Can you truly unlock the full potential of your Raspberry Pi, accessing its power and functionality from anywhere in the world? Yes, with the right setup and a little technical know-how, you can transform your pocket-sized computer into a remotely accessible powerhouse, a digital Swiss Army knife at your fingertips.
The allure of a Raspberry Pi lies in its versatility. From home automation hubs and media servers to educational tools and even retro gaming consoles, its applications are seemingly limitless. However, its true potential often remains untapped, confined to the local network, just a few feet away. The desire to control your Pi, access its data, and troubleshoot issues from afar is a common one. Herein lies the crux of the matter: how do you break free from the limitations of your local network and truly harness the power of remote access?
The journey begins with understanding the fundamentals of Secure Shell (SSH). SSH is more than just a means of remote access; it's a secure gateway, an encrypted tunnel through which you can safely manage your Raspberry Pi. It's an essential tool, providing a secure and reliable method for remote command-line access to your device. This encrypted connection ensures that all communication between your computer and your Raspberry Pi is protected from eavesdropping, making it a cornerstone of secure remote management.
The following table summarizes the key steps and tools required to enable remote SSH access to your Raspberry Pi. Each step is a building block in the process, ensuring that you create a robust and secure connection:
| Step | Description | Tools/Technologies | Notes |
|---|---|---|---|
| 1. Enable SSH on Raspberry Pi | Activate SSH within the Raspberry Pi OS. | Raspberry Pi Configuration Tool, Command Line (raspi-config) | This opens the door for remote access by starting the SSH service on the Pi. |
| 2. Configure a Static IP Address | Assign a permanent IP address to your Raspberry Pi. | Router Configuration, Raspberry Pi Network Settings | Ensures that your Pi's IP address doesn't change, which is critical for consistent remote access. |
| 3. Understand SSH and Port Forwarding | Set up port forwarding on your router to forward external traffic to your Raspberry Pi. | Router Configuration, SSH | Allows external devices to connect to your Raspberry Pi via your home network. Ensure SSH port (typically 22) is forwarded. |
| 4. Determine Your Public IP Address | Find out your public IP address, which is used to connect to your network from outside. | Web Search (e.g., "What's my IP"), Router Configuration | Necessary for knowing the external address you'll use to connect. Consider using a Dynamic DNS service if your IP is dynamic. |
| 5. Implement a Dynamic DNS Service (Optional but Recommended) | If your public IP address changes, use a Dynamic DNS (DDNS) service to provide a consistent domain name. | DDNS Provider (e.g., DuckDNS, No-IP), Router Configuration | Simplifies access if your IP address is not static. The DDNS provider updates the DNS record whenever your IP changes. |
| 6. Utilize SSH Clients | Use an SSH client to connect to your Raspberry Pi remotely. | PuTTY (Windows), Terminal (macOS/Linux) | These clients are used to initiate the SSH connection using the IP address (or domain name), username, and password. |
| 7. Consider Additional Security Measures | Enhance security by changing the default SSH port, disabling password authentication (using SSH keys), and implementing firewall rules. | SSH Configuration, UFW (Uncomplicated Firewall) | These extra layers of security protect your Raspberry Pi from unauthorized access. |
For further information on SSH and network configuration, you can refer to the official Raspberry Pi documentation and tutorials at: Raspberry Pi Documentation
The initial setup can seem daunting, but the rewards are well worth the effort. With remote SSH access, you gain the ability to manage your Raspberry Pi from virtually anywhere with an internet connection. This opens up a world of possibilities, whether you're monitoring your smart home from a vacation, troubleshooting a project remotely, or simply enjoying the convenience of command-line access from the comfort of your couch.
One of the simplest ways to achieve remote access involves leveraging the existing SSH capabilities of the Raspberry Pi and utilizing a service like pitunnel.com. This approach allows you to create a custom tunnel, enabling access to your Pi via a pitunnel.com address. It's a straightforward method to access your Raspberry Pi SSH through pitunnel.com, using an address format such as pitunnel.com:12345. The process typically involves entering a command in your Raspberry Pi terminal to create the custom tunnel.
Services like pitunnel are designed to simplify the process of remotely accessing your Raspberry Pi and the projects you build on it. Beyond providing remote access, these services often include a device monitor and remote terminal. Many also allow you to create custom tunnels, granting access to services running on your Raspberry Pi.
Another popular method involves using a service like Cloudflare Tunnel. Cloudflare Tunnel offers a reliable, free, and relatively simple setup process, utilizing SSH's own forwarding capabilities for remote access. This approach involves installing the Cloudflare connector (client software) on your Raspberry Pi. Once installed, you can configure a tunnel and access your Raspberry Pi's SSH via Cloudflare's network. The advantage of this method lies in its ease of setup and the inherent security benefits of using Cloudflare's infrastructure.
Enabling remote SSH access, however, is only the first step. Once you have SSH enabled, you must then configure your network to accept external connections. This involves several key considerations:
- A Stable Internet Connection: A reliable internet connection is a prerequisite for consistent remote access. The Raspberry Pi and the device you use to connect must both have an active internet connection.
- Public IP Address or Dynamic DNS: You'll need a public IP address or a dynamic DNS service to reach your Raspberry Pi from the outside. If you have a static public IP, it doesn't change. However, if your IP address is dynamic, it changes periodically, and a dynamic DNS service helps keep track of these changes, providing a consistent domain name.
- Port Forwarding: You'll need to configure port forwarding on your router. This process directs incoming traffic on a specific port (usually port 22 for SSH) to your Raspberry Pi's internal IP address.
Accessing your Raspberry Pi from a remote location also often involves the use of an SSH client such as PuTTY on Windows or the built-in terminal on macOS and Linux. You'll need the following credentials: your Raspberry Pi's username, your Raspberry Pi's password, and your Pi's IP address, or the domain name provided by your dynamic DNS service.
One common hurdle that many users face is connecting to their Raspberry Pi outside their local network. The setup of remote SSH access is about overcoming this limitation. This article guides you through the essential steps to configure remote access from anywhere. Whether you are using it for personal projects or a part of your smart home setup, these steps will ensure a reliable and secure connection.
Many individuals, particularly those new to Linux and networking, might find the configuration process initially challenging. The aim is to demystify the process and provide clear, actionable steps.
Setting up a Raspberry Pi with a static IP address and enabling remote SSH access is a great way to maximize its utility and securely manage it from anywhere. Whether you're using it for personal projects or as part of your smart home setup, these steps will ensure a reliable and secure connection. Whether you're setting up a home server, controlling IoT devices, or just tinkering around, mastering SSH can save you tons of time and effort.
To fully leverage the remote management features on your Raspberry Pi, enabling the SSH service is essential. This method provides secure access to a terminal session, allowing you to manage your device from anywhere, whether it's for personal projects or smart home setups.
Before diving into the specifics of remote SSH, it's crucial to ensure that SSH is enabled on your Raspberry Pi. Fortunately, the Raspberry Pi OS provides an easy-to-use graphical interface for this purpose. The Raspberry Pi configuration tool, accessible through the desktop environment, simplifies the process, eliminating the need to interact directly with the command line. Once enabled, SSH will activate SSH in the Raspberry Pi OS.
With SSH enabled, you can then proceed to set up remote access from anywhere. The initial phase involves creating a custom tunnel. Custom tunnels are created by entering a command in your Raspberry Pi terminal. The first step of the tunnel setup wizard is to use the type of the connector. You can choose a variety of connectors, including services like Cloudflare. These tunnels allow access to your Raspberry Pi through an address such as pitunnel.com:12345 or through a Cloudflare-provided domain.
The use of tools such as raspberry pi imager can further simplify the process. The raspberry pi imager is a quick and easy way to install Raspberry Pi OS and other operating systems to a microSD card, ready to use with your Raspberry Pi. Simply download and install raspberry pi imager to a computer with an SD card reader, and then follow the onscreen prompts to write the OS image to your microSD card.
The final step is to boot up your pi and log in. Enter the default password (raspberry) when prompted, and begin the remote access configuration process.
Remember, setting up remote SSH access is a valuable skill. It streamlines your ability to manage your Raspberry Pi, save you time, and open up a world of possibilities. Master SSH commands on your Raspberry Pi to considerably streamline your remote management tasks and familiarize yourself with essential commands for improved connection speed and security measures.

![ssh into raspberry pi from anywhere [3 easy steps]](https://cdn.statically.io/img/tunnelin.com/wp-content/uploads/2020/06/raspberry_pi_ssh.png?quality=100&f=auto)
Detail Author:
- Name : Nelda Rogahn
- Email : xdouglas@bayer.com
- Birthdate : 2007-01-29
- Address : 5328 Terry Parks Floridaland, NV 49557
- Phone : (539) 761-2548
- Company : Gutmann, Beahan and Schultz
- Job : Pile-Driver Operator
- Bio : Et voluptatem sequi laborum aperiam ut debitis. Earum voluptatum qui molestiae. Vel quam id voluptates perspiciatis. At et eaque fugit eveniet sunt deleniti quas.
